The Smart Option enables you to draw using the different tools while preserving the shades from the original recording and mapping them to the respective colors of the selected color group.
Choosing Colors
Ctrl-Click on a color to bring up the picker and here you can set your colors. 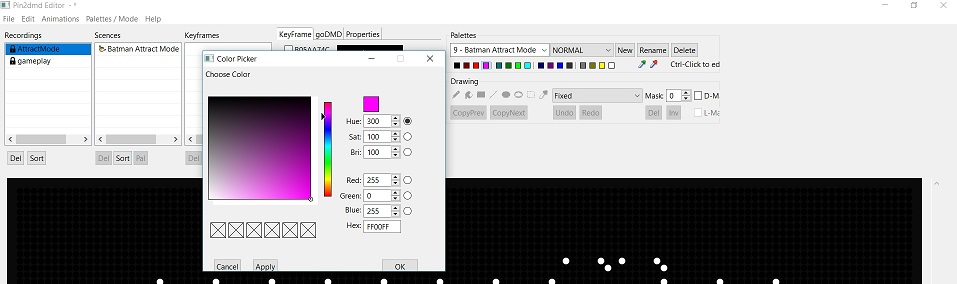
A few things to know first:
- The first 4 colors are the default colors in the scene, Black is usually color number #1(Background) and essentially acts like “led’s are turned off”.
- In “Smart” mode you can use all 16 colors however there are some “rules” you must follow. You will not have access to all 16 unique colors available to you at every point in this mode.
In Smart Mode you have 4 groups (1 A,B,C and D) of 4 colors available to you to interchange and replace with each other.
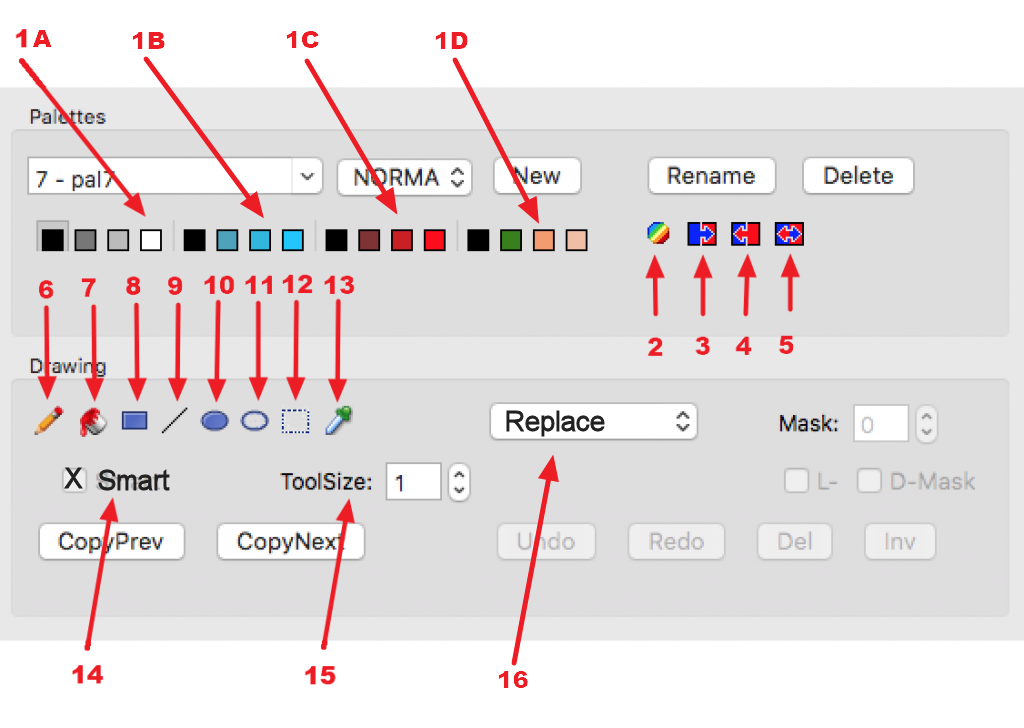
Example: The four base colors of my scene are fro group A. If the 4th color of group A is present in the scene, then I can replace that color with the 4th color I assign to B, C or D. I can not replace the 4th color of A with the third color assigned to group B.
The group of colors are in essence tied together by the slots they are in (1-4).
The coloring tools work a little differently in Smart mode than they do in in non Smart mode.
The Pencil Tool in Smart Mode
The Pencil tool works slightly different in Smart mode.
- Select the Pencil tool and click on a dot to color, you can also click and drag with this tool to color. The color will be replaced with the corresponding color slot of the color group you selected in the palette.
In Smart mode you don’t have to select an individual color just one of the 4 color groups.
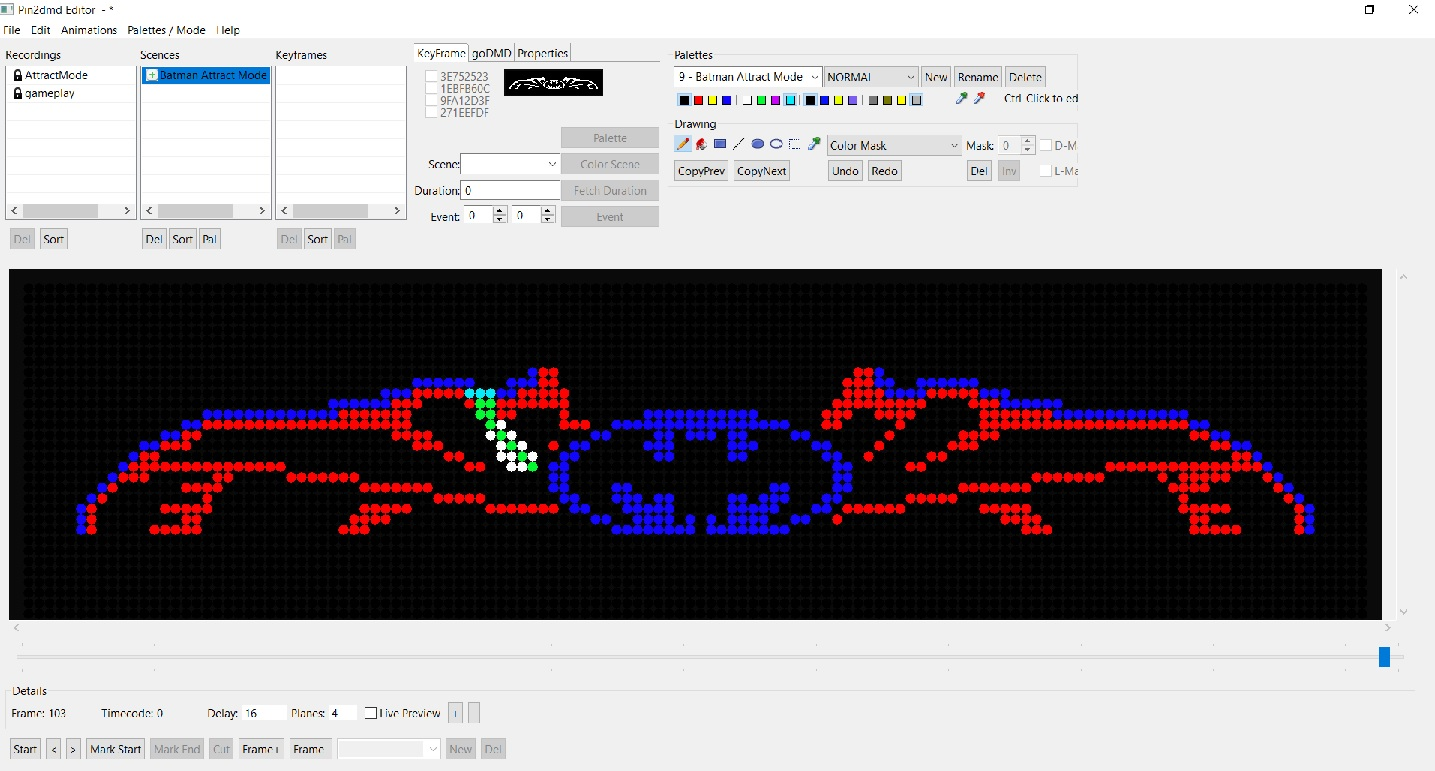
In this example I selected mask group “B” and you can see where I used the draw tool, the colors were replaced. Color 1-Black to White, Color 2-Red to Green, Color 4-Blue to Light Blue. Color 3 or Yellow is not used in this Scene.
The FloodFill Tool in Smart Mode
The FloodFill tool works slightly different in Smart mode also.
- Select FloodFill tool and click on a dot in a group of like colors, this will replace with the corresponding color slot of the color group selected from palette.
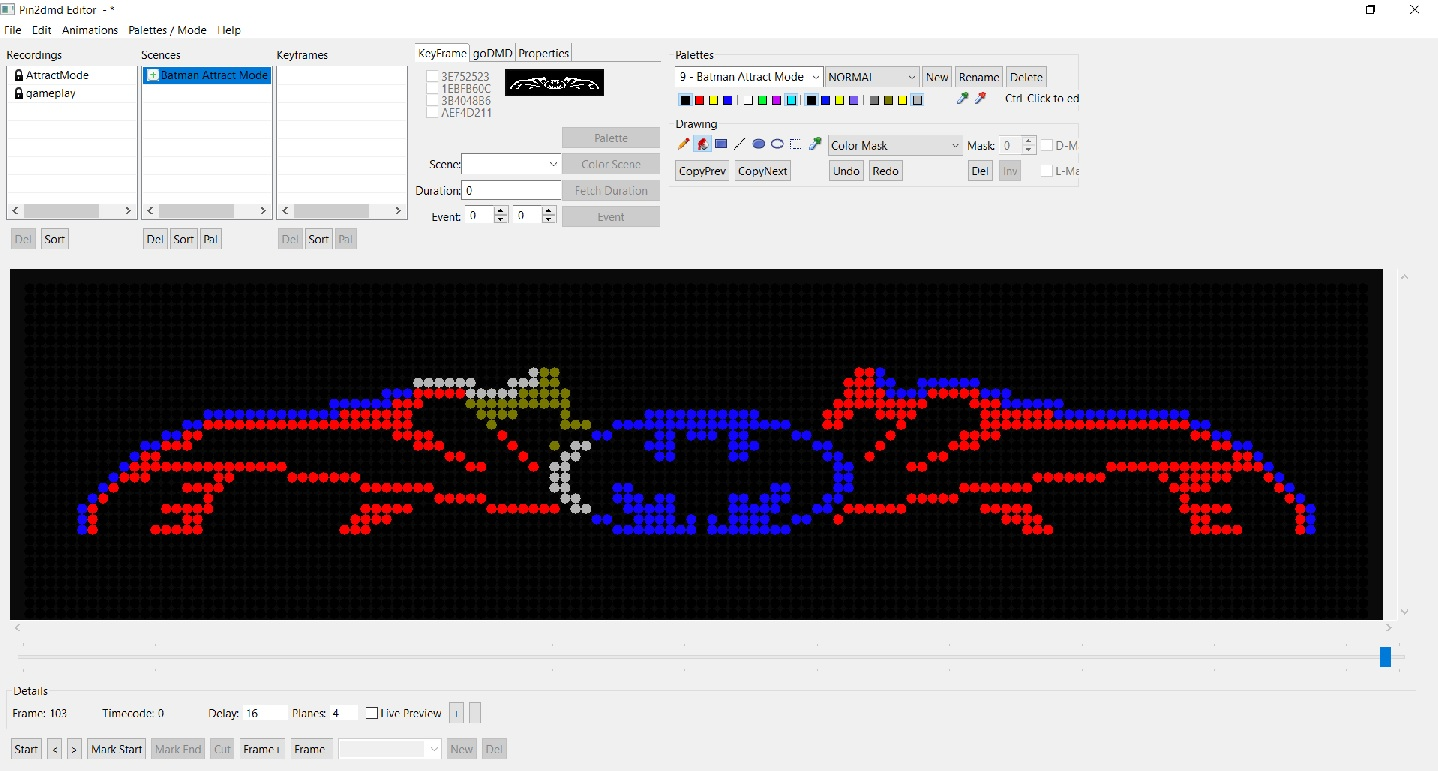
In this example I selected color group “D”, I didn’t click on any color 1 -Black dots so no changes, color 4- Blue turned Grey when clicked, color 2- Red turned Olive when clicked, color 3- Yellow is not used in scene
The Rectangle Tool in Smart Mode
- Select Rectangle tool and you can drag a rectangle shape anywhere in frame replacing all dots with the corresponding colors from the mask group selected in the palette.
In this example I chose color group “C” and you can see the ghost outline of where I dragged my frame replacing all colors in my box from group “A” to “C”. For this to work correctly you’ll notice that color 1 of C is black just like color 1 of A, this is where you might need to duplicate colors in your palette for efficiency. You can free up the duplicate colors in Replace mode later when you deactivate the Smart Option and use e.g. the FloodFill to map all occurrences of the same color to a single slot of the palette.
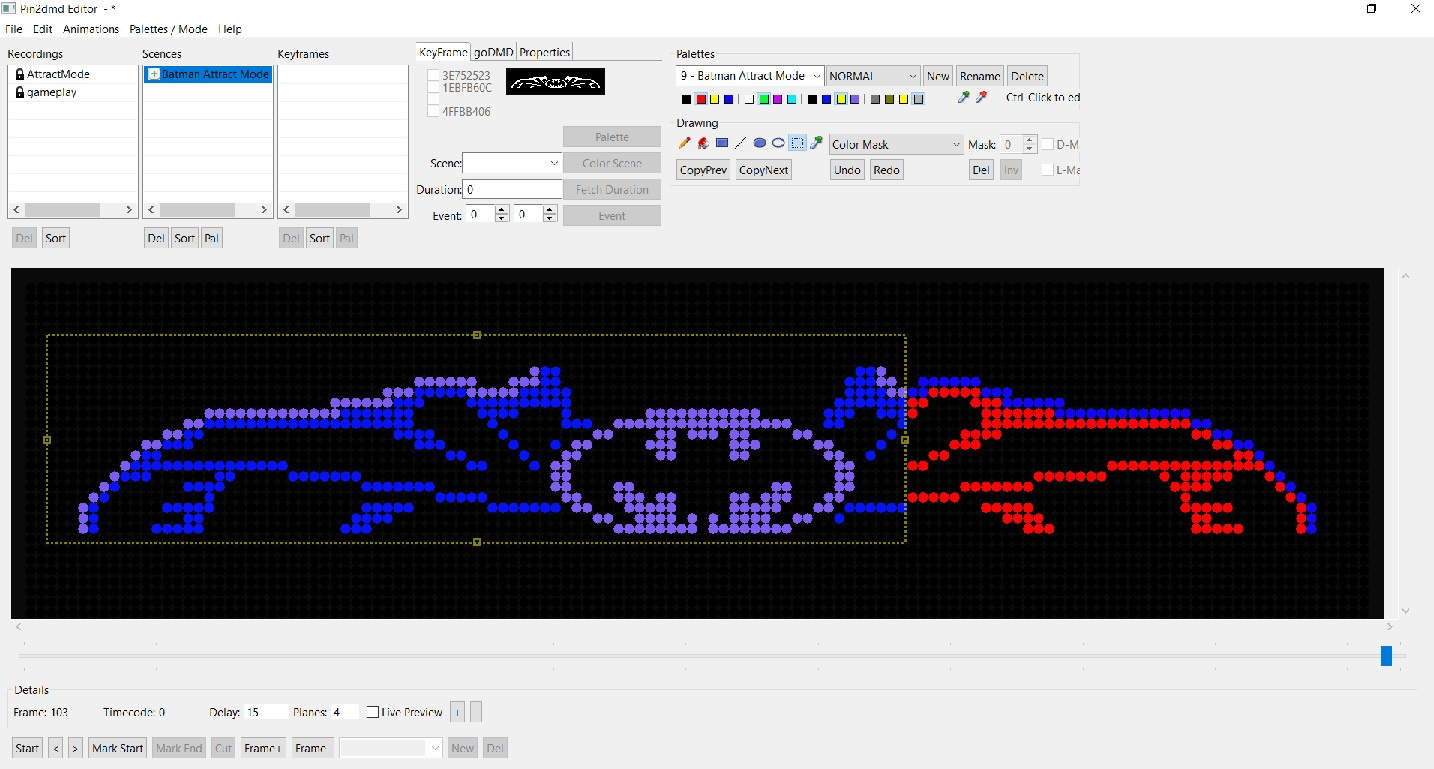
This is what I end up with using the Rectangle tool. I selected color group “C” and drug my cursor over the whole frame.
Color 1-Black to Color 1 of C -Black,Color 2- Red to Color 2 of C -Blue,Color 3- Not used,Color 4- Blue to Color 4 of C -Lt. Blue.
Now I want to color the Bat symbol Yellow and the arms and chest Grey. I will be configuring my palette colors in color group “B” to achieve this.
Here is the finalized frame!
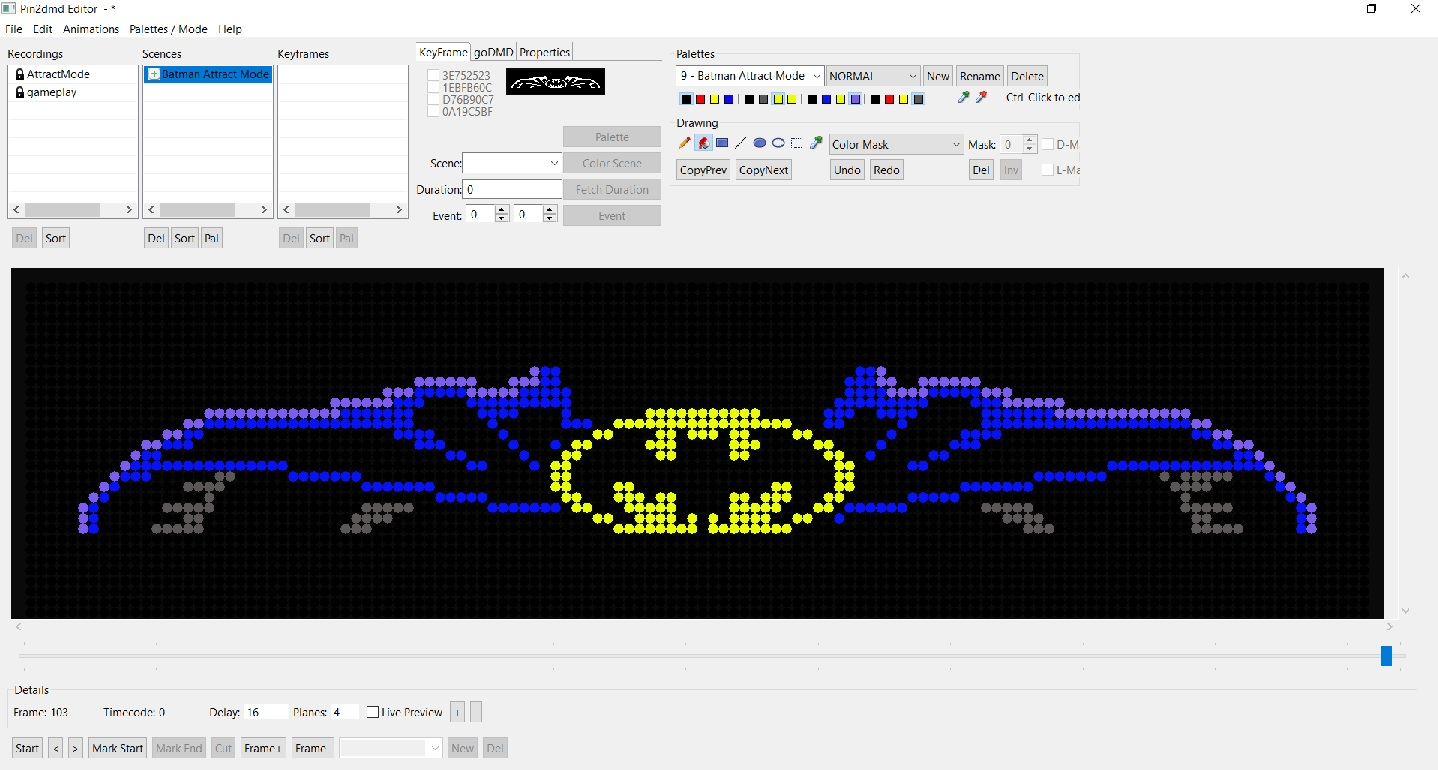
I used the FloodFill tool and got yellow and grey into my frame by selecting color group B.
I configured color group “B” in the palette as follows to achieve this.
I only configured slots B2 and B4 to achieve what I needed. I then replaced what was C2- Blue with B2- Grey and C4- Lt. Blue with B4- Yellow.
I now have 2 of the 4 mask groups configured(B & C) for this scene and I have only two groups (A & D) left if needed for additional colors.
There are color limitations with Smart option activated in Replace mode but there are tremendous efficiencies as well with this option. You’ll have to practice with the editor and decide when to activate the smart option of the tools.