Choosing Colors
Ctrl-Click on a color to bring up the color picker and here you can set your colors.
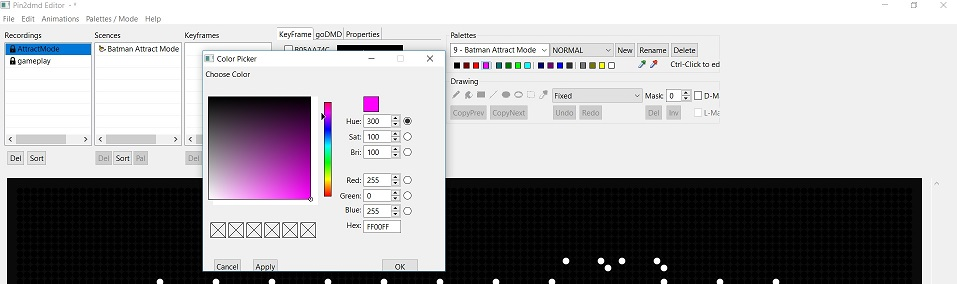
A few things to know first:
- The first 4 colors are the default colors in the scene, Black is usually color number #1(Background) and essentially acts like “led’s are turned off”.
- In “Replace” mode you can use all 64 colors freely as you choose, this is not the case in “Color Mask” mode but we’ll touch on that later.
The Draw Tools
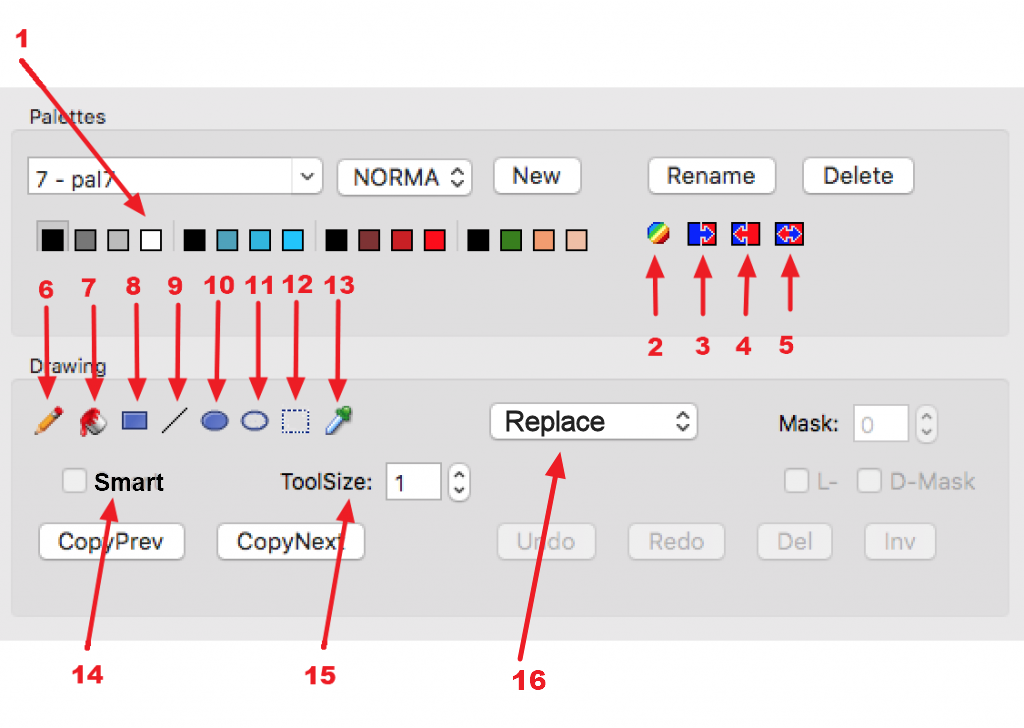
- The Palette of colors available to you (16 or 64 depending on the config setting).
- The Gradient Tool lets you create two gradient colors based on the first and the last color of the selected swatch (group of 4 colors).
- Copy the selected swatch to clipboard
- Paste the selected swatch from the clipboard to the selected place in the palette.
- Exchange the selected swatch with the one from the clipboard
- Pencil Tool – Colors a fixed number of dots at a time with selected color from palette.
Number of dots is adjustable with ToolSize (15) - FloodFill Tool – Fills entire area of like color with the selected color from palette
The tolerance is adjustable with ToolSize. - Rectangle Draw Tool – Draws a rectangle in the selected color
- Line Tool – Draws a line from one point to another in any direction.
Line is straight if ToolSize is 1 and dotted if ToolSize is greater than 1. - Same as #8, just an oval shape
- Circle Tool – just draws a circle
- Select Area Tool – Selects a area to copy
- Color Picker Tool – Selects a color from a full color (24bit RGB) image.
- Smart Draw Mode – Draw using the different tools above while preserving the shades from the original recording and mapping them to the respective colors of the selected swatch. It is disabled in this chapter.
- ToolSize – Adjust the size of the selected tool
- The selected Draw Mode – In this chapter we choose “Replace”
The Pencil Tool
The Pencil tool is pretty self-explanatory and works the same as in any other paint or drawing application.
- Select Draw tool and click on a dot to color one at a time, you can also click and drag with this tool to color.

The FloodFill Tool
The Fill tool works the same as in any other paint or drawing application.
- Select Fill tool and click on a dot in a group of like colors, this will replace the group with the color selected from palette.
The Rectangle Tool
The Rectangle tool is an extremely powerful tool for the editor. It is best used with Smart enabled or in ColorMask modes and very handy. It is not particularly useful in Replace mode.
- Select Rectangle Color tool and you can drag a rectangle shape across your frame replacing all dots with the color selected from palette.
The Line Tool
The Line Color tool works the same as in any other paint or drawing application.
- Select Line tool and you can create a line in any direction across your frame replacing all dots between your beginning and ending point with the color selected from palette. With ToolSize greater as 1 you can create dotted lines.
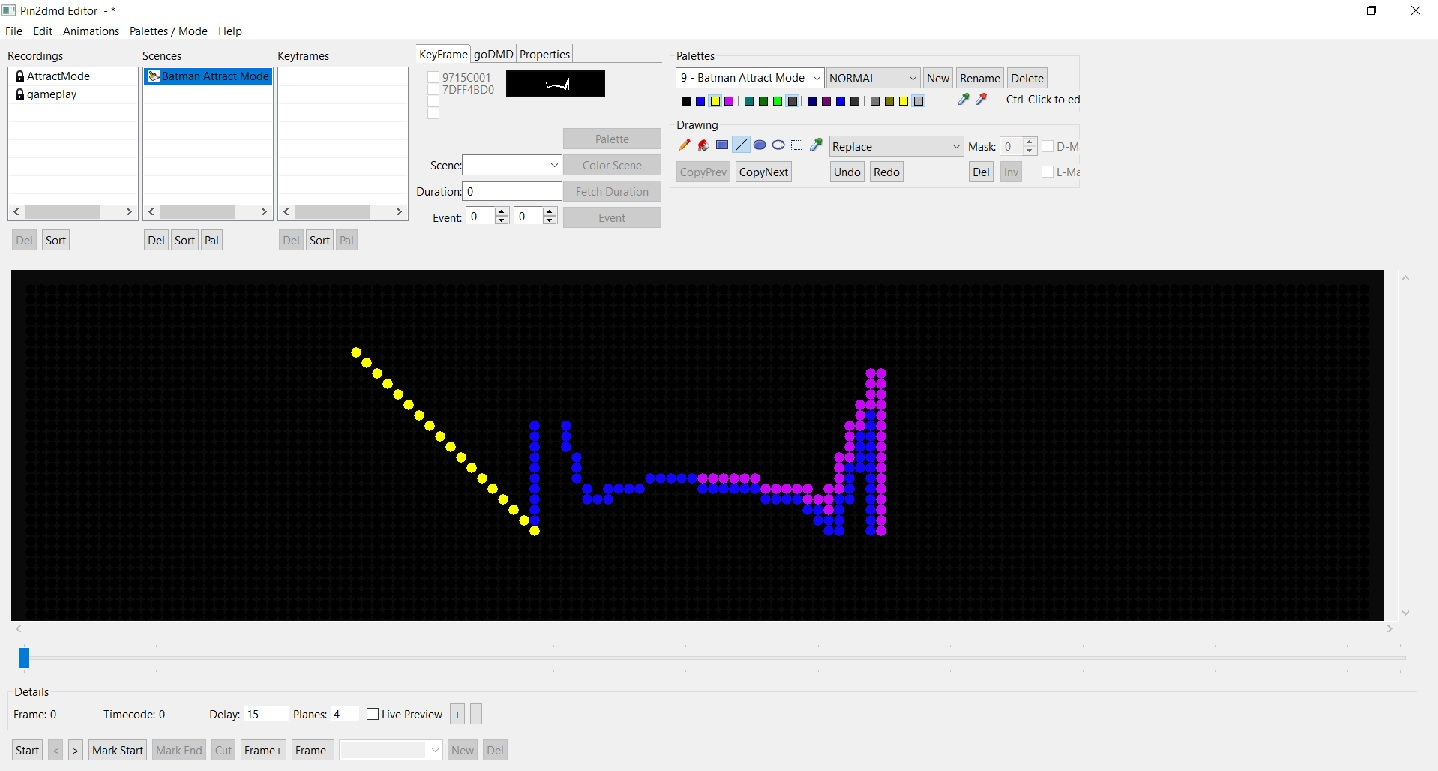
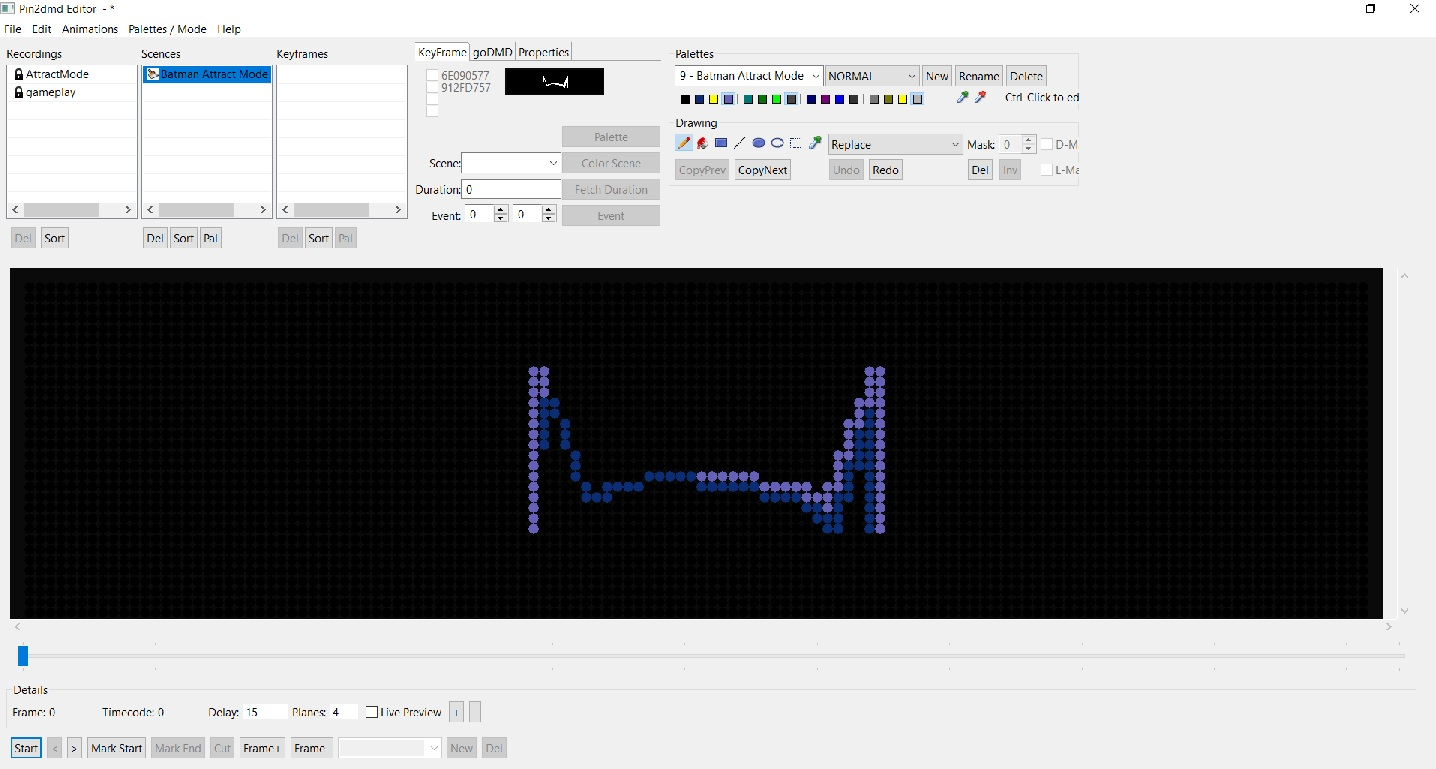
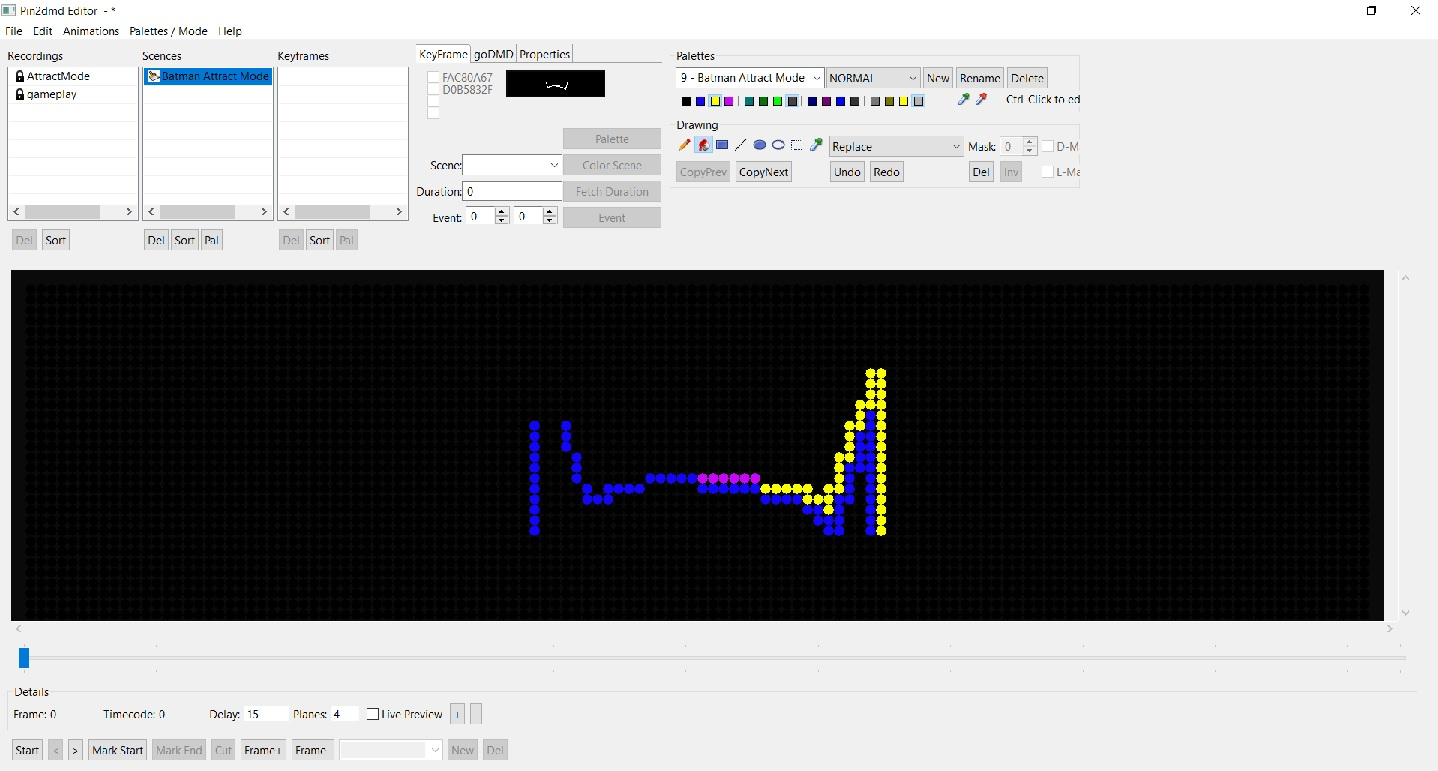
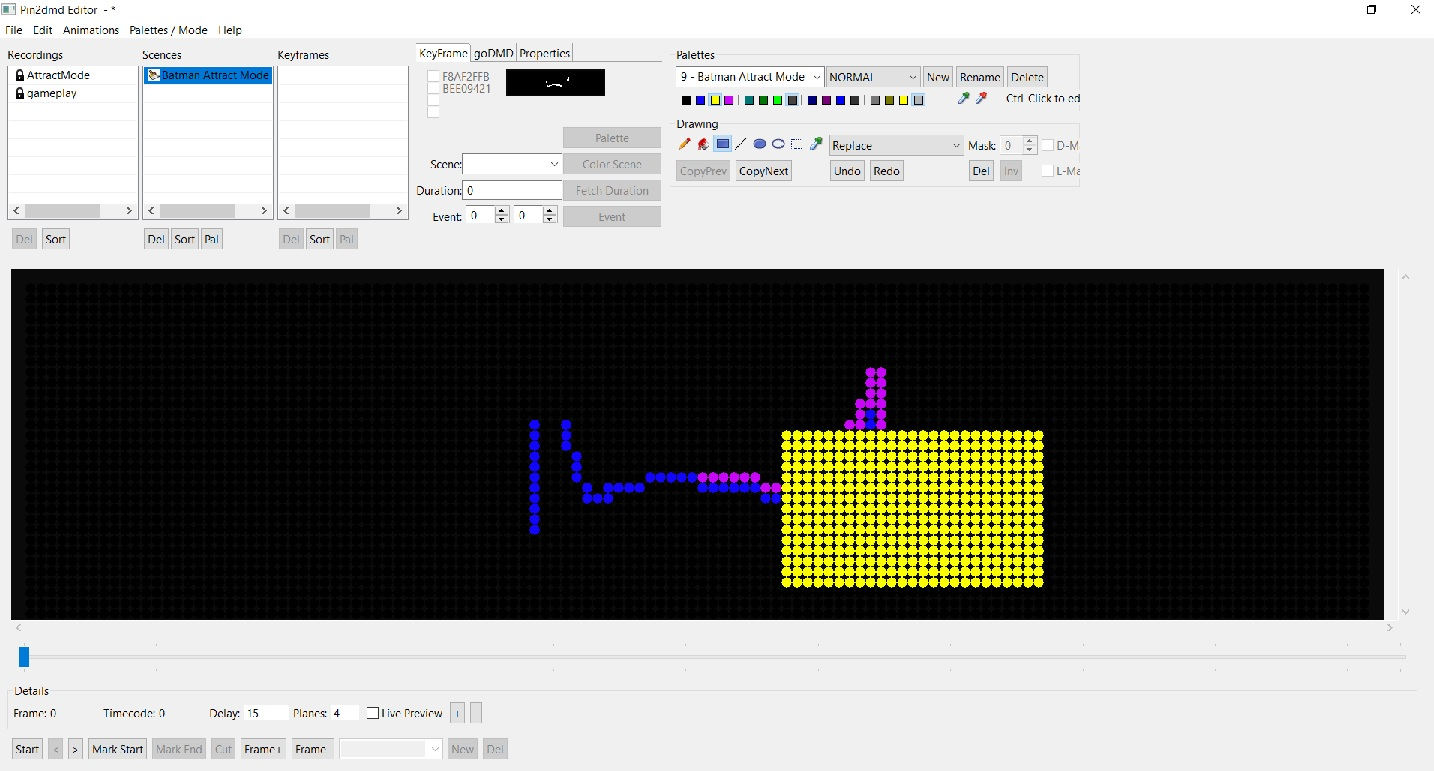
You are ready to color this scene!
In our example the first frame is colored and the missing dots have been added to complete the silhouette of Batman’s cowl. Colorizing projects can be tedious and time consuming. This scene alone has over 100 frames. The more you practice the more efficient you’ll get at coloring, there are some more advanced tools and features in the editor that can make coloring quicker and easier. We’ll tackle those later on.